| Seekzed Knowledge Services
"Soft Knowledge, Fast Knowledge"
|
|---|
HOW TO MAKE DRIVE PARTITION WITHOUT FORMATTING:Hard drives are storage devices which are used to save data and files. The space provided in the hard disk can be divided into different drives. Mostly the hard drives are partitioned in two or more parts which help in classified storage. We can store the data according to the type of data in different drives. Dividing the disk in different drives helps when the operating system partition is crashed. If one disk is crushed, the data of other drives is saved and it is easy to repair. If the disk is not partitioned and the data is placed in operating system only, and the system is attacked by any virus then it is troublesome to recover the data. Also the time take to recover the data and documents is too much. In the computer technology, there are many facilities provided by the operating systems. Also each new operating system comes with new and advanced facilities compared to its predecessor. Operating Systems like Windows7 and Windows Vista provide a facility of partitioning and re-sizing the hard disk. Below mentioned are the steps with which the hard disk can be partitioned in Windows 7. To start with, go to Start option and go to the option "Computer". Right click the "Computer" option and then navigate to the option of "Manage". 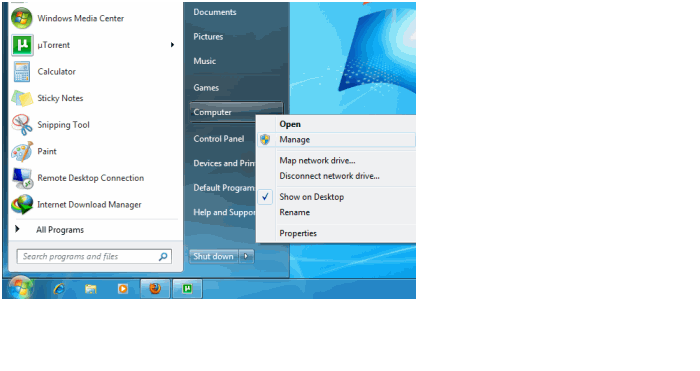
A new screen will be opened with the name "Computer Management". Click the "Storage" option and go to "Disk Management". 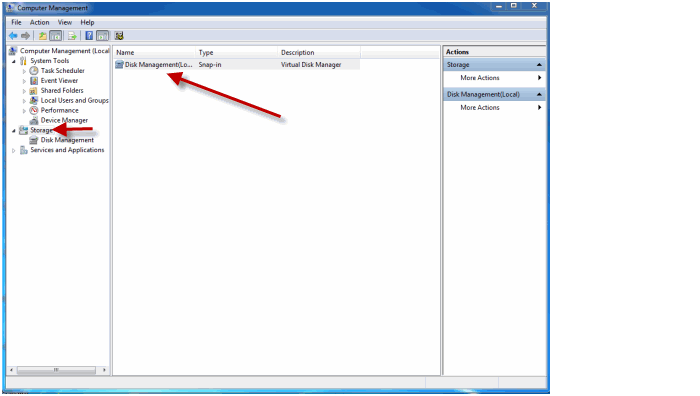
Now we can see all the drives present in our computer. 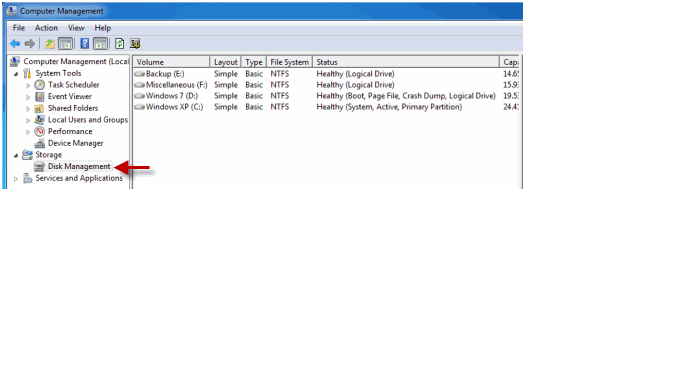
Select the drive which needs to be partitioned. Right click on the selected drive and select the option "Shrink Volume". 
A new window will get opened, which will show the current size of the drive and the available space. In the next column, we need to enter the size of the drive, with which it should shrink. We should enter the value which should be in the limit of the available space which is displayed in the above column. 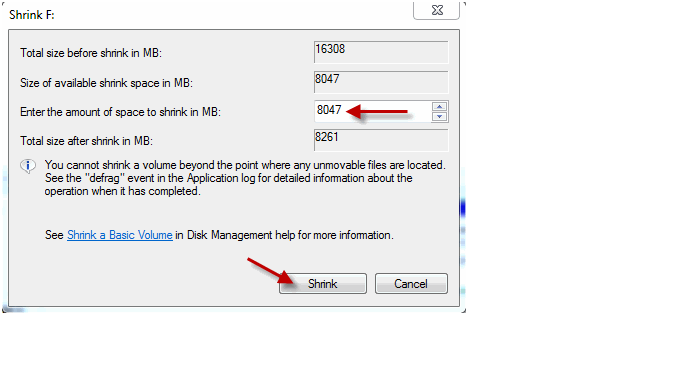
After entering the required values, click the "Shrink" button. Wait till the process gets complete. It may take some time to complete the process. The time taken depends on the size of the drive. Once the process is complete, a new screen will appear which will show the unallocated space. This value will be same as the one which we have entered on the previous screen. Select this unallocated space, and right click on it and choose the option of "New Simple Volume". 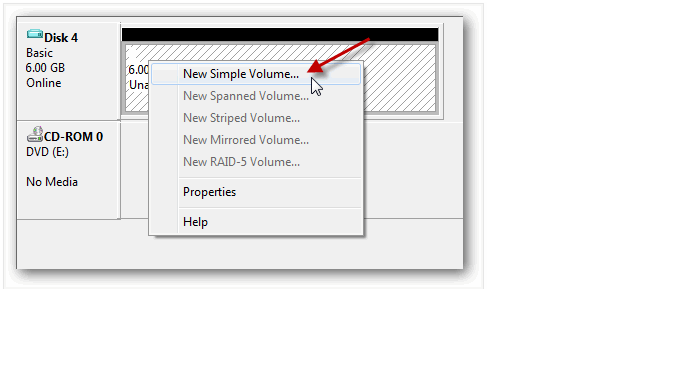
A new screen will open, on which we need to enter the details of the new drive. Usually the details are same as we entered on the shrink screen. We need to assign a name to the newly created drive. We can assign any letter. The file system needs to be selected as "NTFS" After all the details are filled, press the "Next" button and then press "Finish". 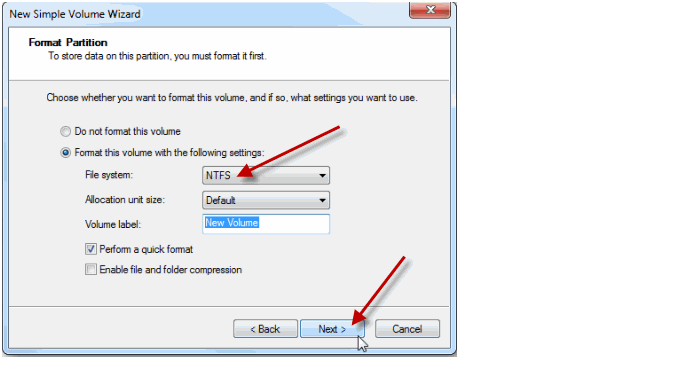
Now our disk has been partitioned, and we did not require formatting our computer. |
|
Home|
Technology|
IT Computer|
Exam|
Banking|
Finance|
General|
Other|||Copyright © Seekzed.com -2015.||||All Rights Reserved. ||
Design and Developed By RaynaSys Technologies. |
|---|